
Posted by John Poitras on 2024 Aug 21st
Night Vision: Passive Aiming a Sniper Rifle 2024 European Best Sniper Competition - Field Report
Editor's Note: Inside MDT Writer, Army Staff Sgt. John Poitras recently competed in the 2024 European Best Sniper Competition. From our conversation, John had to borrow a sniper rifle and was only given 10 minutes to zero and DOPE his rifle. John, along with his partner, Finnish Maj. Matti Finnila competed together for six days and ultimately came in 3rd! Congratulations, John and Matti! ~ Thomas Gomez, Managing Editor Inside MDT.
I recently participated in the 2024 European Best Sniper Competition. This event hosted 36 teams from 19 nations, and I encountered situations and problems requiring creative solutions. A major problem was the lack of proper equipment during the night shooting event. In this article, I describe the situation and explain how I used passive aiming and tape markings on my scope to overcome. Additionally, I will highlight the importance of mastering your equipment and adapting to new challenges in ever-changing and challenging environments.
For this shoot, I was partnered with Finnish Maj. Matti Finnila. Maj. Finnila used a rifle with a clip-on night optic and a clip-on thermal optic. For readers unfamiliar with clip-on optics, these quick-release optics mount in front of your day scope to enhance the optic's capabilities in low-light situations. However, I was using a borrowed rifle that wasn't equipped to receive a clip-on optic, which created a huge problem for our team.

Rifle with a clip-on night vision device. Photo courtesy of Nick Chen.
PASSIVE AIMING THROUGH A MAGNIFIED OPTIC
The only night vision I had for the competition was my issued AN/PSQ-40 ENVG III, which is a head-mounted night vision monocular with a thermal overlay. Since I could not mount a clip-on device, my only option was to look through my day optic, which is known as passive aiming. Passive Aiming is an accepted technique when running carbines with non-magnified optics but can be hard to use for magnified optics. Passive aiming uses the night vision device while looking through your weapon's optic. This technique can be used with either single or dual-tube night vision devices. Some shooters don't find this technique to their liking, and that is fine. I still encourage them to test it at least out and keep this technique in their toolbox in the event they ever need to use it.
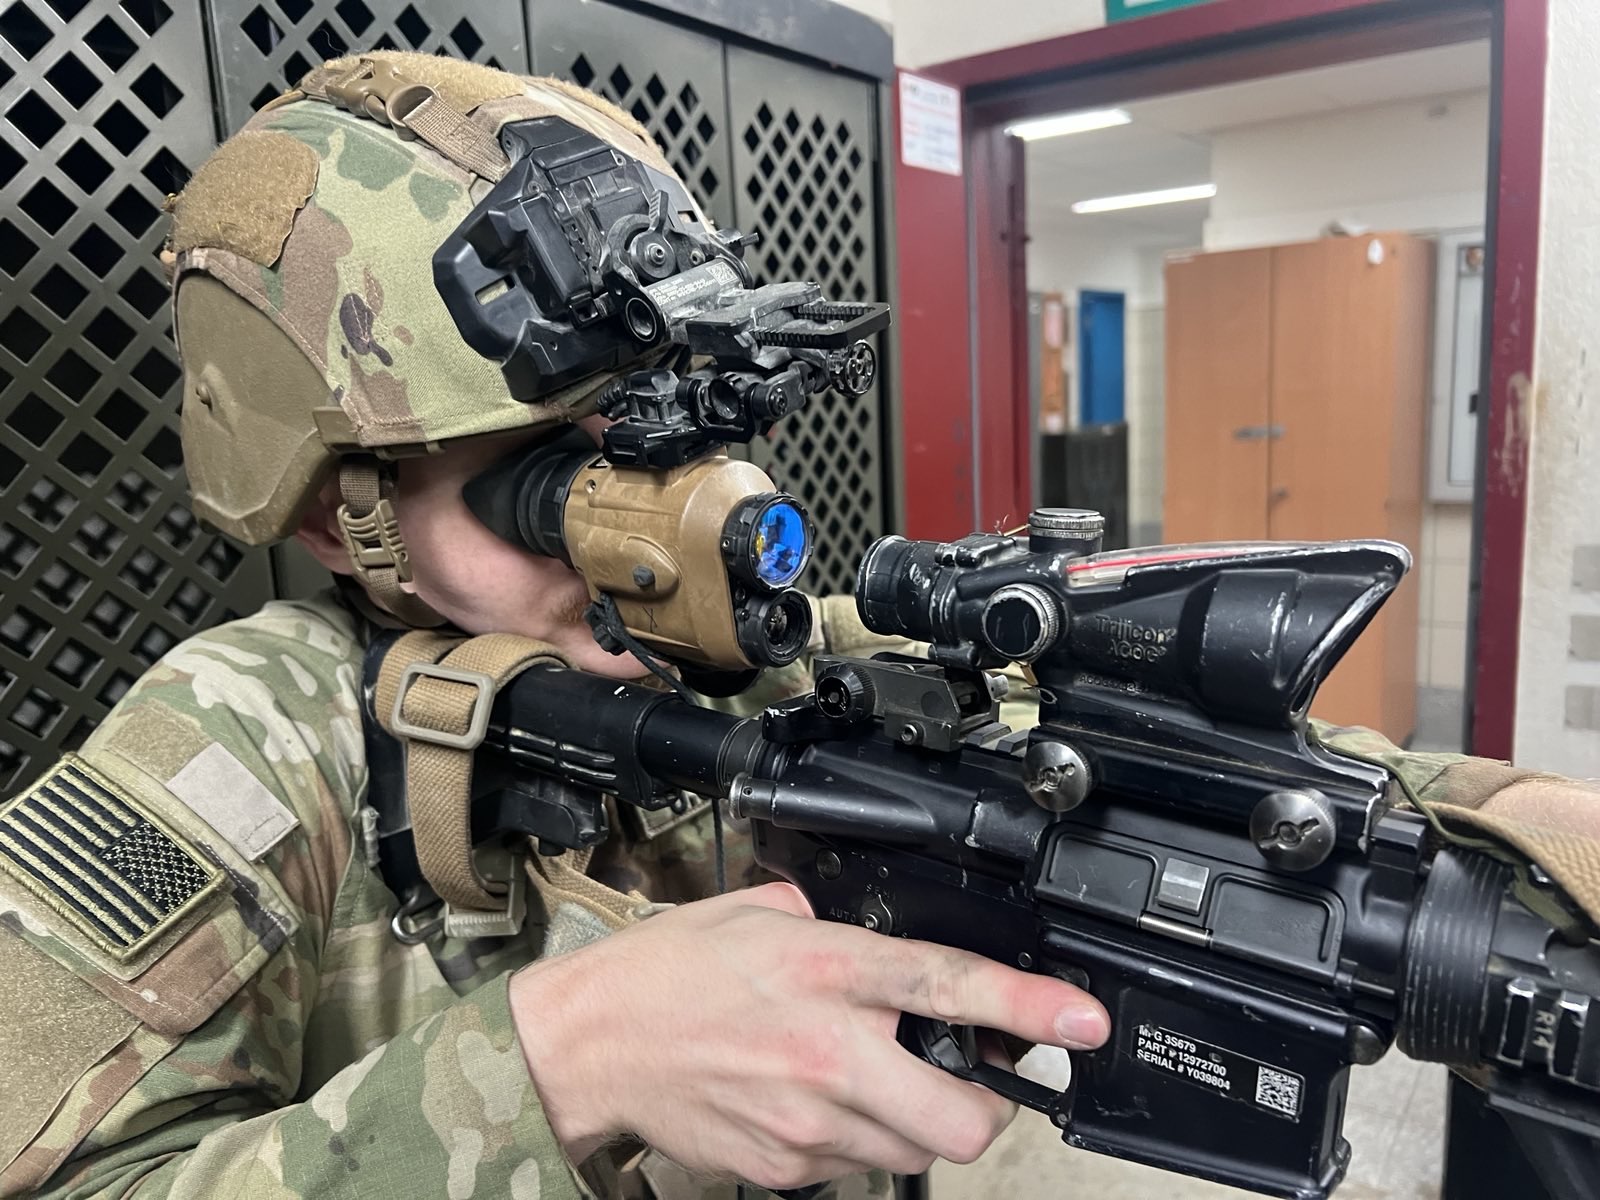
US Army Soldier passive aiming through an ACOG. Photo courtesy of John Poitras.
As previously mentioned, the AN/PSQ-40 has a thermal overlay though it had no value in this application because the thermal objective lens and the infrared objective lens are offset from each other. Moreover, the thermal imager sees the temperature of the glass and not the target downrange. I tried to leave the thermal on to see targets while I was off the gun. However, what happened was that with slight movements, the thermal imager would pick up the temperature of the scope and wash out my vision. I ended up turning off the thermal overlay. Setting up night vision to passively aim through a high-power scope is a little more complicated than doing so with a reflex sight. I had to pull the night vision device back to my eye where it was touching my face. This allowed the space to get my night vision behind the scope without completely ruining my cheek weld.
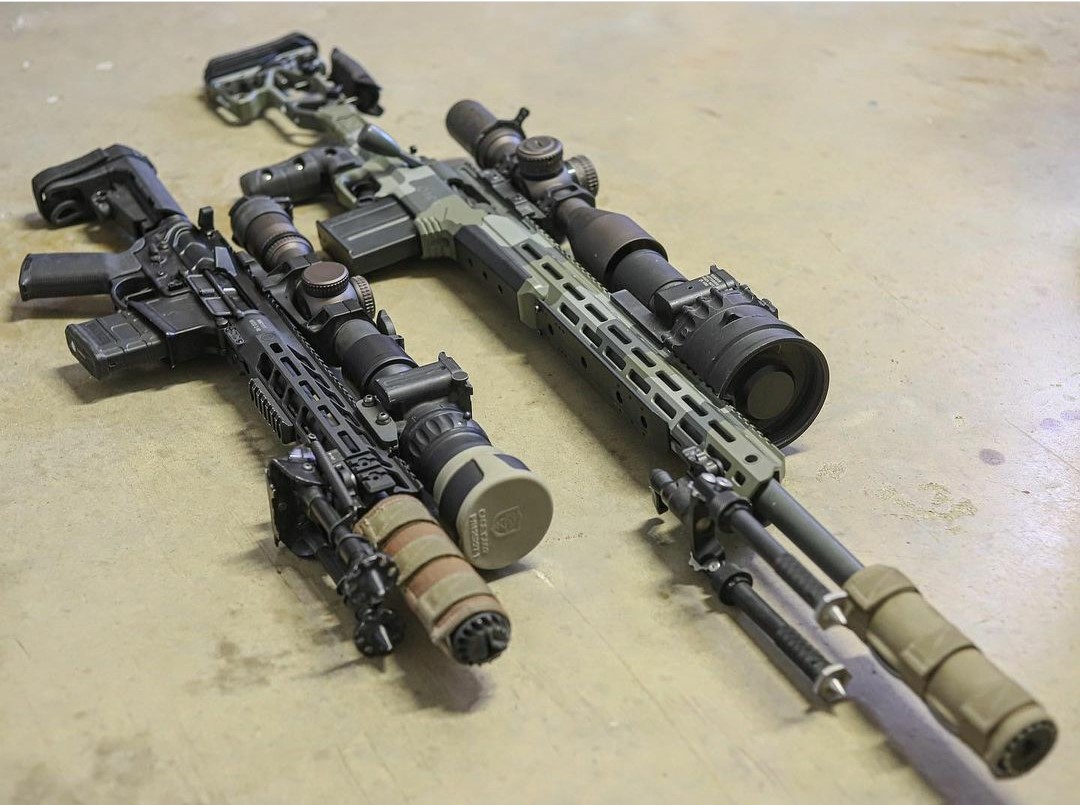
Rifles that can accommodate clip-on devices make night shooting easier and more efficient. Photo courtesy of Anthony Amantine.
Secondly, I had to focus the night vision device as close as possible, approximately 2-4 inches, so that I was able to use my reticle. With the focus adjusted properly, I was able to see my reticle. However, slight movements made the focus challenging. To remedy this, I maintained a very precise eye relief. Turning up the illumination setting of the reticle helped some, but it began to wash out the view, and it was hard to see through the scope down range. With the illuminated reticle's brightness set correctly, I had a decent sight picture and, with good ambient light, could see a town 8 km away.
THE NIGHT SHOOT
On the night of our shoot, we only had about 30% illumination. The targets were marked with two chem lights hanging from the bottom. The chem lights out to 1200 meters made the stationary targets easy to identify, but Positive Target Identification (PID) was difficult after about 300 meters. I had to engage some targets by just holding above the chem lights, though I could not see the targets. It was not ideal, but it worked enough for the sake of the competition. I would only feel comfortable using this method to engage in a real-world situation if I identified a hostile muzzle flash or something else that clearly identifies a target as hostile.
The moving targets were another problem. Out of 4 moving targets, I was only able to find two of them. Searching and tracking was very difficult. Because the night vision was focused very close so I could use my scope, I couldn't see down range nor scan for targets without my scope, so I was unable to search the area fast enough to acquire the targets. Additionally, with the night vision device focused so close, I was unable to see my surroundings when moving up to and between firing positions. This is not ideal in a fast-paced or kinetic environment.
John with his borrowed SAKO Rifle. Photo courtesy of DOD/DVIDS.
To sum up, it is possible to use a helmet-mounted night vision device to passively aim a precision rifle at night when no other options are available. The cons are that attaining and maintaining proper focus and PID targets takes time. Additionally, it hampers the ability to move efficiently and keep good situational awareness of the environment due to the focus level requirement of the night vision device.
TAPE MARKINGS
The second thing I did for the competition was taught to me by my partner, Maj. Finnila. Which was to wrap tape on my elevation turret and then mark my ranges on the tape so I could quickly turn my turret to the correct elevation. This is a very effective method to adjust your turrets for elevation quickly and accurately when not using holds, particularly if you use a traditional Tactical Milling Reticle instead of a grid reticle like a Horus H-59. The only downside is that the marks you put on the tape will not adapt to current atmospherics, so when shooting in different environments, it will just get you close. If you use this method, be sure that you do not cover the mil marks on your turret so that you can still precisely dial to the correct elevation appropriate to the current atmospherics.
I wrapped my elevation turret with illumination tape for the night shoot and marked it with the above method. Additionally, I put a piece of illumination tape below the turret with a reference line to help ensure that I could get the lines set properly without guesswork in the dark. This worked well, but a few shortfalls make this less than ideal for long engagements or real-world applications at night. Light is required to "charge" the tape. So, we covered my scope with my helmet and shirt while we shone a light on it. After that, I only got about 20-30 minutes of good light out of the tape; it would get dim and was difficult to read.

John Poitras, along with his teammate Finnish Maj. Matti Finnila. Photo courtesy of DOD/DVIDS.
So, the downsides of this for night shooting are the light required to make it work, the short amount of time that this will work, and lastly, for real-world application, it leaves a glowing ring around your turret, which may compromise a shooter's position. To sum up, marking your scope with tape for quick adjustments is very useful, but illumination tape for night shooting has limitations, especially for real-world applications.
MOVING FORWARD
Overall, we were able to use the equipment available to accomplish the tasks placed in front of us. I recommend using the proper equipment to accomplish your task, but in a pinch, knowing the capabilities of your equipment and learning to apply them appropriately is needed at the time. Don't just test it out in a relaxed environment. Put your equipment and skills to the test by facing challenges that will push you and your equipment to the limits.
Lastly, get out of your comfort zone and never stop learning from experience and other shooters. You never know what new techniques you might stumble upon or pick up from the people around you. I am extremely grateful to have worked with Maj. Finnila. His prowess as a sniper and willingness to share his knowledge and experience with those around him will continue to benefit me and many other shooters of multiple disciplines.

Congratulations John and Matti! Photo courtesy of DOD/DVIDS.
In conclusion, the problems we faced at the 2024 European Best Sniper Competition underscored the importance of both equipment proficiency and adaptability. Faced with the challenge of inadequate night optics, we employed passive aiming and innovative scope markings to navigate the event effectively. These techniques, while not perfect, highlighted the necessity of understanding and testing equipment under various conditions. The experience reinforced that mastery of both gear and technique, combined with a willingness to adapt, is crucial for success in high-stakes scenarios. Moving forward, shooters should continually refine their skills, embrace new methods, and thoroughly understand their equipment to tackle any challenge. Continuous learning and adaptation are key to excelling in ever-evolving and demanding environments.
ABOUT THE AUTHOR
John Poitras was a United States Reconnaissance Marine and a Marine Scout Sniper. After leaving the Marine Corps, he enlisted in the Army and serves as a Scout Team leader. Outside of the military, he works as a precision rifle instructor for QPro Defense and Shadow Mountain Group. He has a passion for his craft and constantly learns new ways to improve himself.