
Posted by Eric Drake on 2024 Jan 16th
How to Camo Paint a Rifle - MDT Mention
YouTuber PYRATE Firearms and Reloading created a viewer-requested video showing his rifle camouflage painting process on a compact bolt action rifle, which featured a Tikka T3 and an MDT HNT26 Chassis System!
At first glance, the HNT 26 Chassis is eye-catching with its raw carbon fiber inserts and bodywork. While this rifle chassis may look good, many hunters and shooters require a lower profile look to their firearms and gear so they do not stand out in certain environments. PYRATE Firearms & Reloading uses three Krylon “Ultra Flat” Camouflage spray paints to camouflage his rifle.
To start, the host tapes off holes in his rifle’s receiver, the optic’s scope lenses, the rubber recoil pad, the rifle’s muzzle, and the magazine well. He commences with the lightest tan paint color and applies a very light coat of the paint to promote the adhesion of the following layers. The entire rifle is sprayed with this light coat.
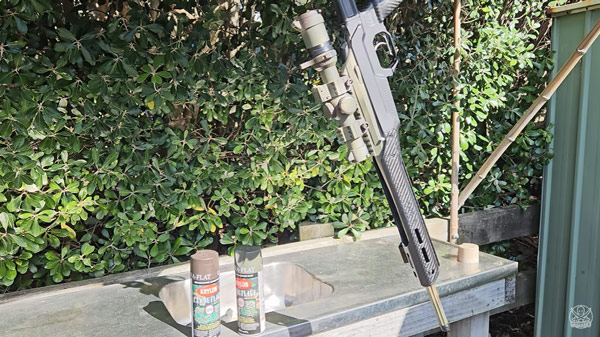
Note the muzzle, receiver and scope caps protecting the bore, inside of the receiver and lenses. When painting, make sure to do it in a well ventilated area.
With the first coat of paint dried, a second, thicker layer of tan paint is applied to all parts of the rifle. After twenty minutes of drying, flat brown paint is sprayed onto all sides of the rifle in a “stripe” pattern to break up the silhouette of the rifle’s body against the previously applied light tan paint.
To finish the paint job, a flat “Olive” green paint that helps blend the bolder brown paint with the light tan base coat is applied on the rifle in patches. Finally, the host removes all masking tape from the rifle and reattaches all removed parts. Reference photos are provided in the video showing the rifle blending into the host’s local wilderness.
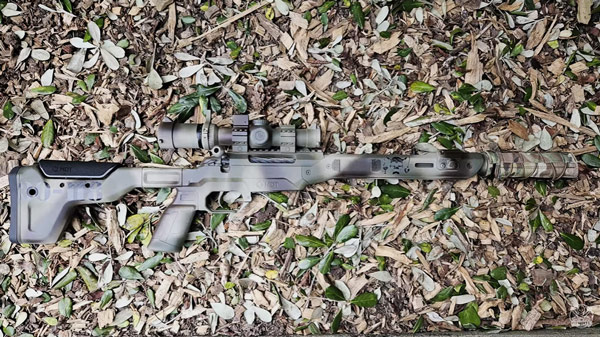
Very effective paint job!
DIY RESOURCES FROM MDT
- Scavenging Brass
- Upgrading the Savage Axis
- How To Remove A Tikka Barrel
- How To Hunt Stone Sheep In British Columbia
- Crimping Handloads
- DIY $6 Target Stands - Guns And Guitars
- Essentials For Your Range Bag
- Impact Shooting: Magazine Mod for a Howa Barreled Action
- Fire Forming and Loading 223 AI
- How to Paint Your Rifle