
Posted by Ryan Holm on 2024 Aug 29th
Learning to Build a Custom Rifle - Inside MDT
Editor’s Note: All photos courtesy of Mark Twight.
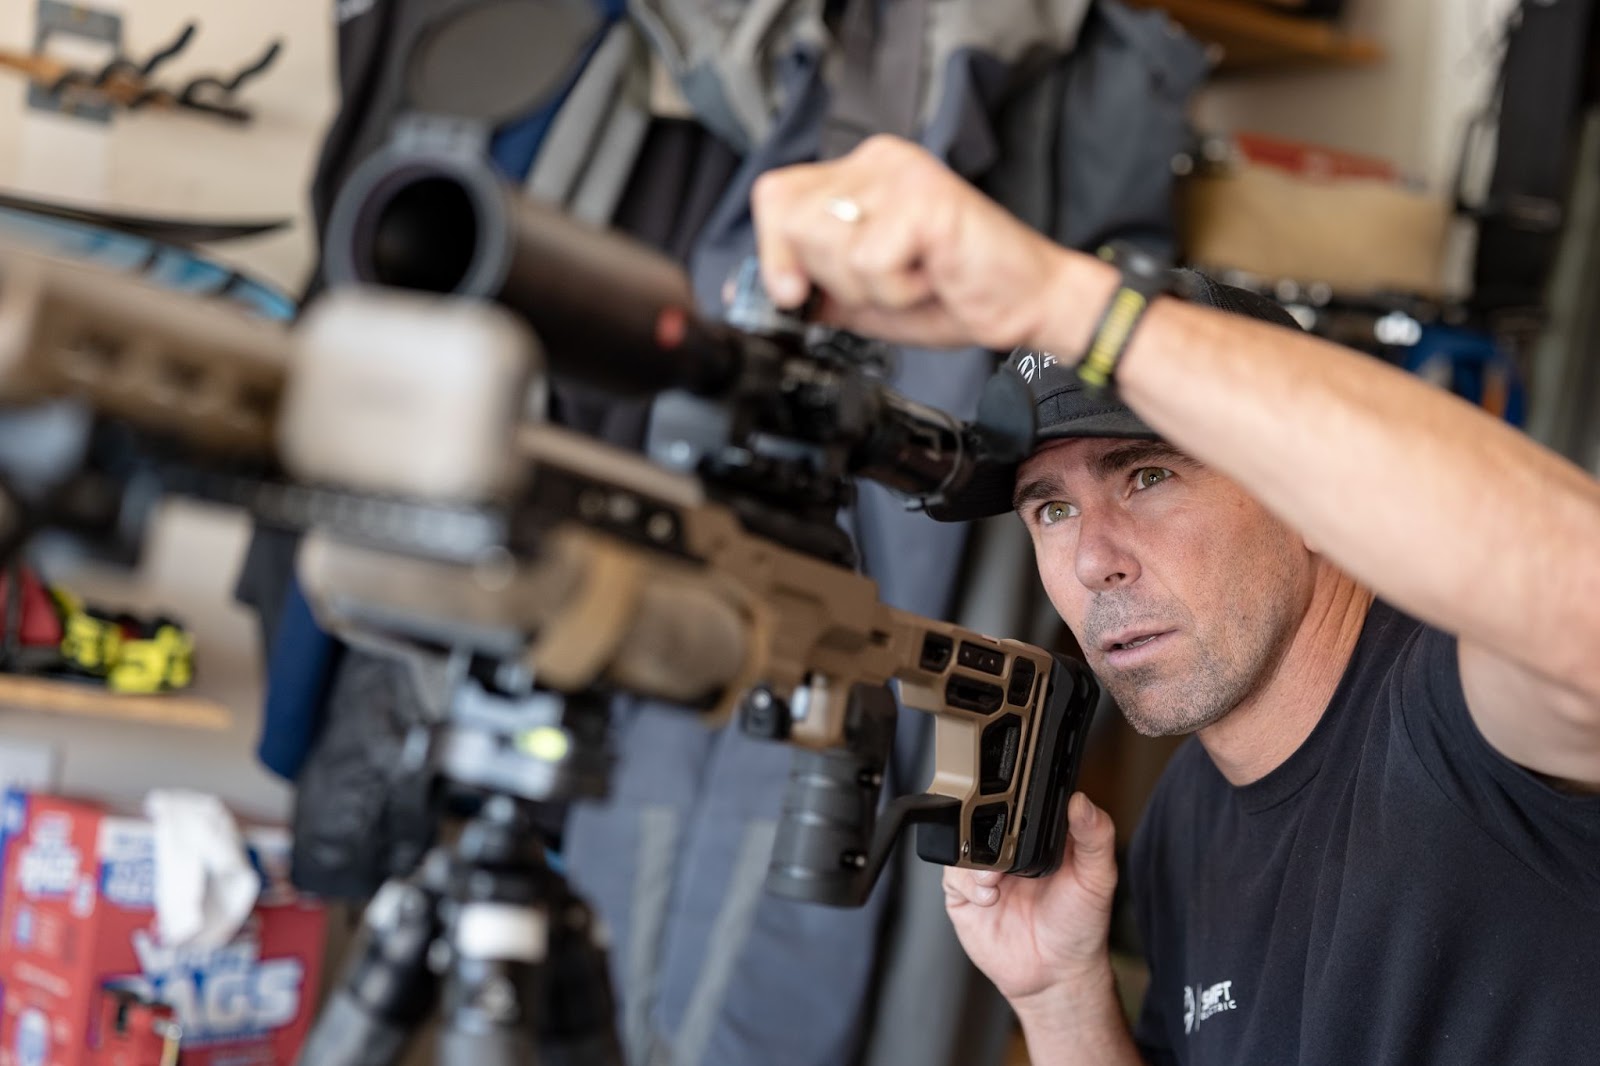
Zero. I had absolutely zero knowledge about how to build a rifle. The terminology alone seemed daunting for any individual to get started—I just nodded when people started throwing out all sorts of numbers and jargon that zipped past my brain (but I'd make a digital note to look this up later). The one secret I figured out throughout the process was to get a technical person on the phone at each brand that I was looking to purchase a component from and ask them all the intricate details about why it was designed a certain way, to explain the terminology they were using, and their suggestions for how we build this rifle. It was great because the intimidation factor was non-existent, and the individuals were gracious in sharing their knowledge—realizing that this community is tight-knit and willing to answer any questions because they may have recognized themselves first starting. And then, I'd fact-check this with friends to see if they'd align with the suggestions.
As someone deeply passionate about hunting, I've always been intrigued by the precision and challenge of long-range shooting. It's never been about applying long distances to shooting big game animals but all the intricacies of positioning for different shots and reading wind. Recently, I decided it was time to take the plunge and build my first custom long-range rifle. This journey has been insightful and educational. I want to share my experience from the initial consultation with a long-range precision coach and friend to the first rounds fired downrange.

CUSTOM RIFLE BUILD
The process began with a thorough consultation with a trusted friend, Jared Miller, focusing on the custom rifle build. We started by defining the rifle's purpose—would it be primarily for precision shooting, hunting, or perhaps a bit of both? This question guided all subsequent decisions—I wanted a precision rifle that could also be used for coyote hunting—I've recently started helping ranchers in Montana with seasonal influxes of coyotes during calving season in the Spring. Next, we discussed caliber selection. For my needs, the 6.5 Creedmoor stood out as a strong contender, offering a good balance between performance and availability. A few other options were the 6 Creedmoor or 6.5 PRC. With the caliber chosen, we move on to the action type. A bolt-action was preferable since my experience as a big game hunter had the muscle memory already built in. It's fascinating to break apart each component and select specifically what performance you'd prefer as a shooter. The Defiance Ruckus Action met my standards for smooth-as-butter tolerances in the action. I could keep an eye on the target downrange and quickly extract the round while keeping my thumb in my grip position without any friction to the ejection through the port—shooting from my friend's complete rifle allowed me to see the difference between my hunting action and a precision quality action. Side-by-side, there is no comparison. Defiance also enables you to select a few different options for nitride, knobs, flutes, serial numbers, etc.
BEST RIFLE BARREL FOR ACCURACY
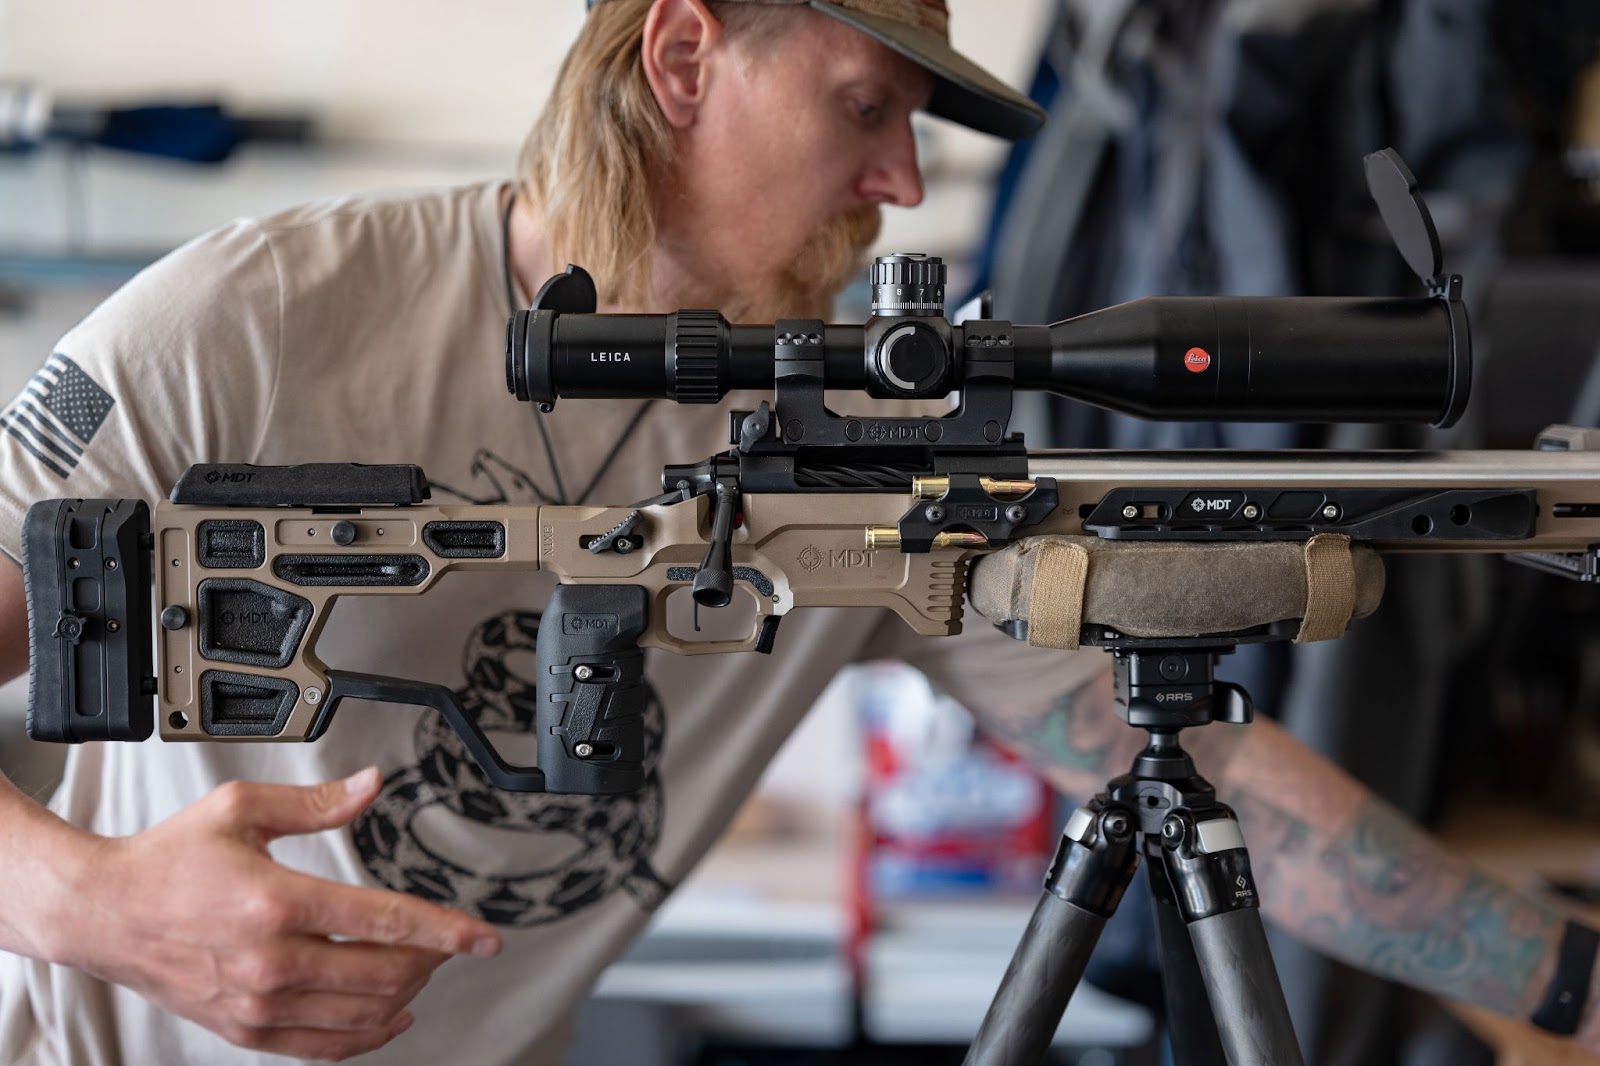
The next step was selecting the barrel. I wanted a match-grade barrel with the right length and twist rate to suit my chosen caliber (it's a thing, so don't cut it short unless you understand the tradeoff for performance—i.e., powder not able to total burn), so after talking with a few technicians, I selected a Proof Research Steel contour 26" Barrel with a 1:8 twist rate. It's impressive how hot these barrels get during matches, so choosing something that can handle the constant heat during a match is required for accuracy and longevity for an expensive component. Also, I'm a resident of Montana, so it's nice to support a local company. Also, don't forget about adding a comp muzzle break with a suppressor as optional. The Surefire SOCOM model allowed me the best of both worlds to run with a muzzle only or the muzzle inside the suppressor—ultra quiet for hunting scenarios.
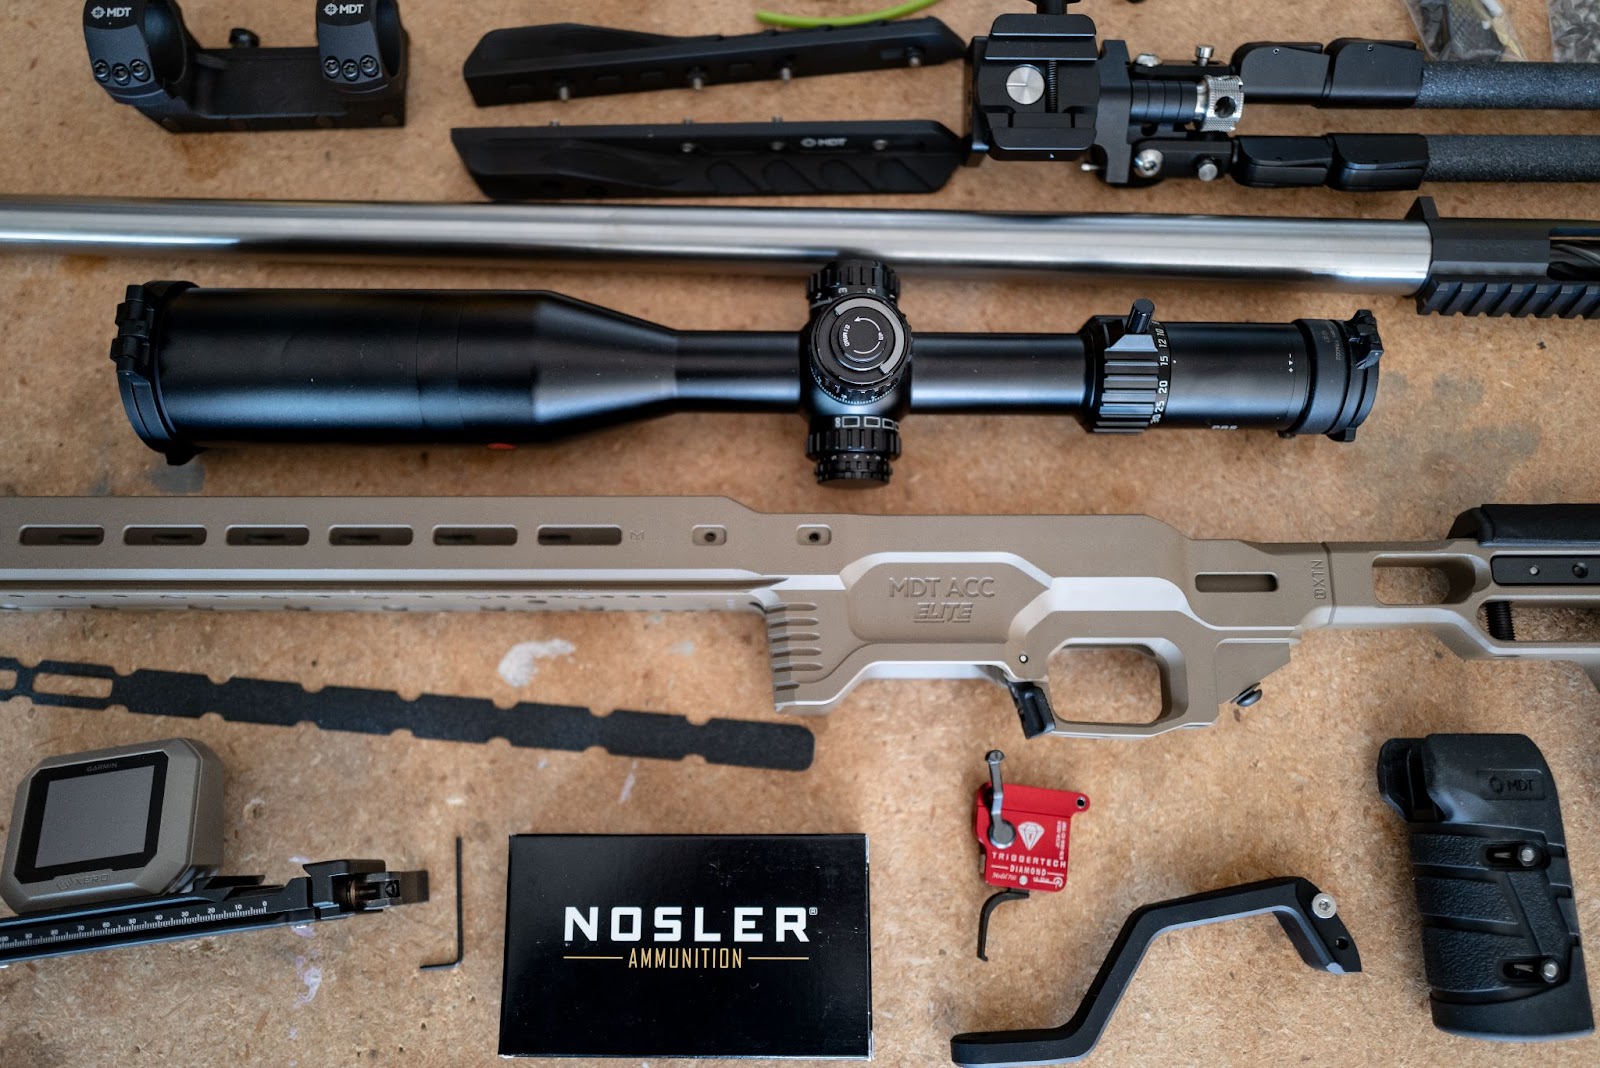
The chassis (or stock) was another critical decision in this custom hunting/precision rifle build. I needed something durable yet ergonomic, so we discussed materials like aluminum or carbon. Also, what accessories would I like to add, or how do I plan to attach the chassis to an Arca Rail, Ball Mount, or other? I opted for an MDT ACC Elite chassis that offered stability and customization. The number of accessories you can add almost seems endless, and my motto for life is that the simpler the design, the more efficient I'll be. Also, you don't always know what you require until you put yourself in the deep end and figure out what is and isn't necessary to succeed. Some valuable accessories were the MDT Send It Level and Baker Wings. The wings for placing your hands to counter the weight shift off different barricades or positions were crucial so that you didn't have to use a hot barrel or chassis—it's impressive when you add a slight amount of pressure to the wing and how it stabilizes your sight picture.
Now, you must wait for things to be manufactured, approved, and shipped. Suppressors have gotten significantly faster recently thanks to Silencer Central moving approvals from 10+ months to three weeks or even less.
LONG RANGE RIFLE ASSEMBLY
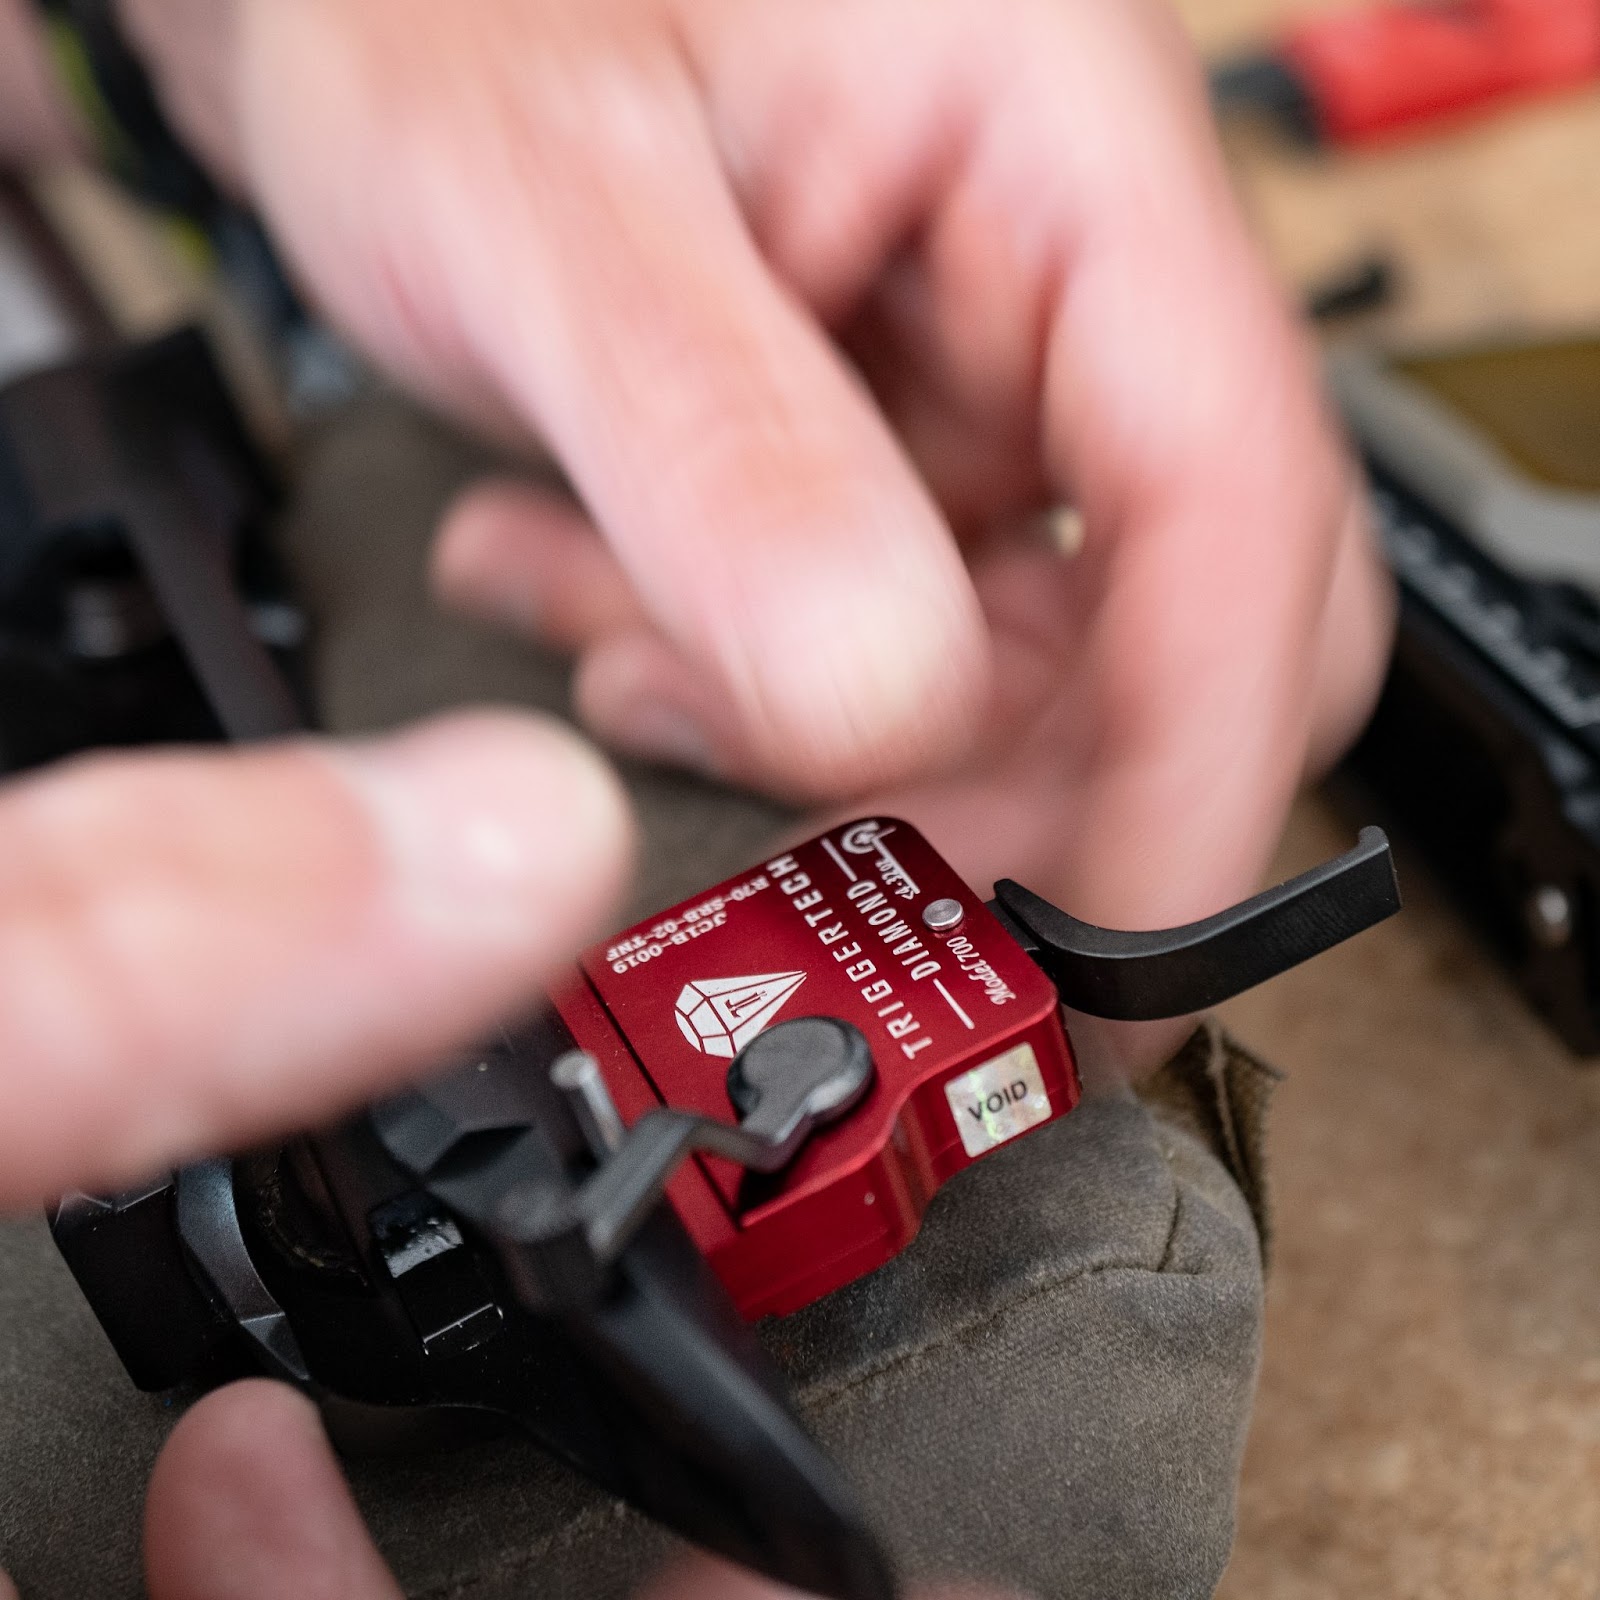
With all the components in hand, it was time to bring the custom rifle to life. The gunsmith started by threading and chambering the barrel to match the action. Precision was vital here, as even the most minor errors could affect accuracy. Proof Research had a pre-fit barrel for the Defiance Ruckus, which helps ensure everything is aligned correctly. Once the barrel was installed and torqued to the action with precise headspace measurements (cool to learn about this process), we took it off the gunsmith's hands. My friend and I finished the job so that I could understand the final assembly. We started by attaching the Triggertech Diamond flat-face trigger—don't ask me why; the flat face felt right. In the stages of learning, the trigger became more critical than I first imagined. The Triggertech with zero creep and adjustable pull weight allows you to refine your process and customize your preference. As you learn to pull into the back wall repeatedly, you'll start to appreciate the diamond design—we left it at the factory setting before going any lighter to reduce accidental discharge for the first couple of matches.
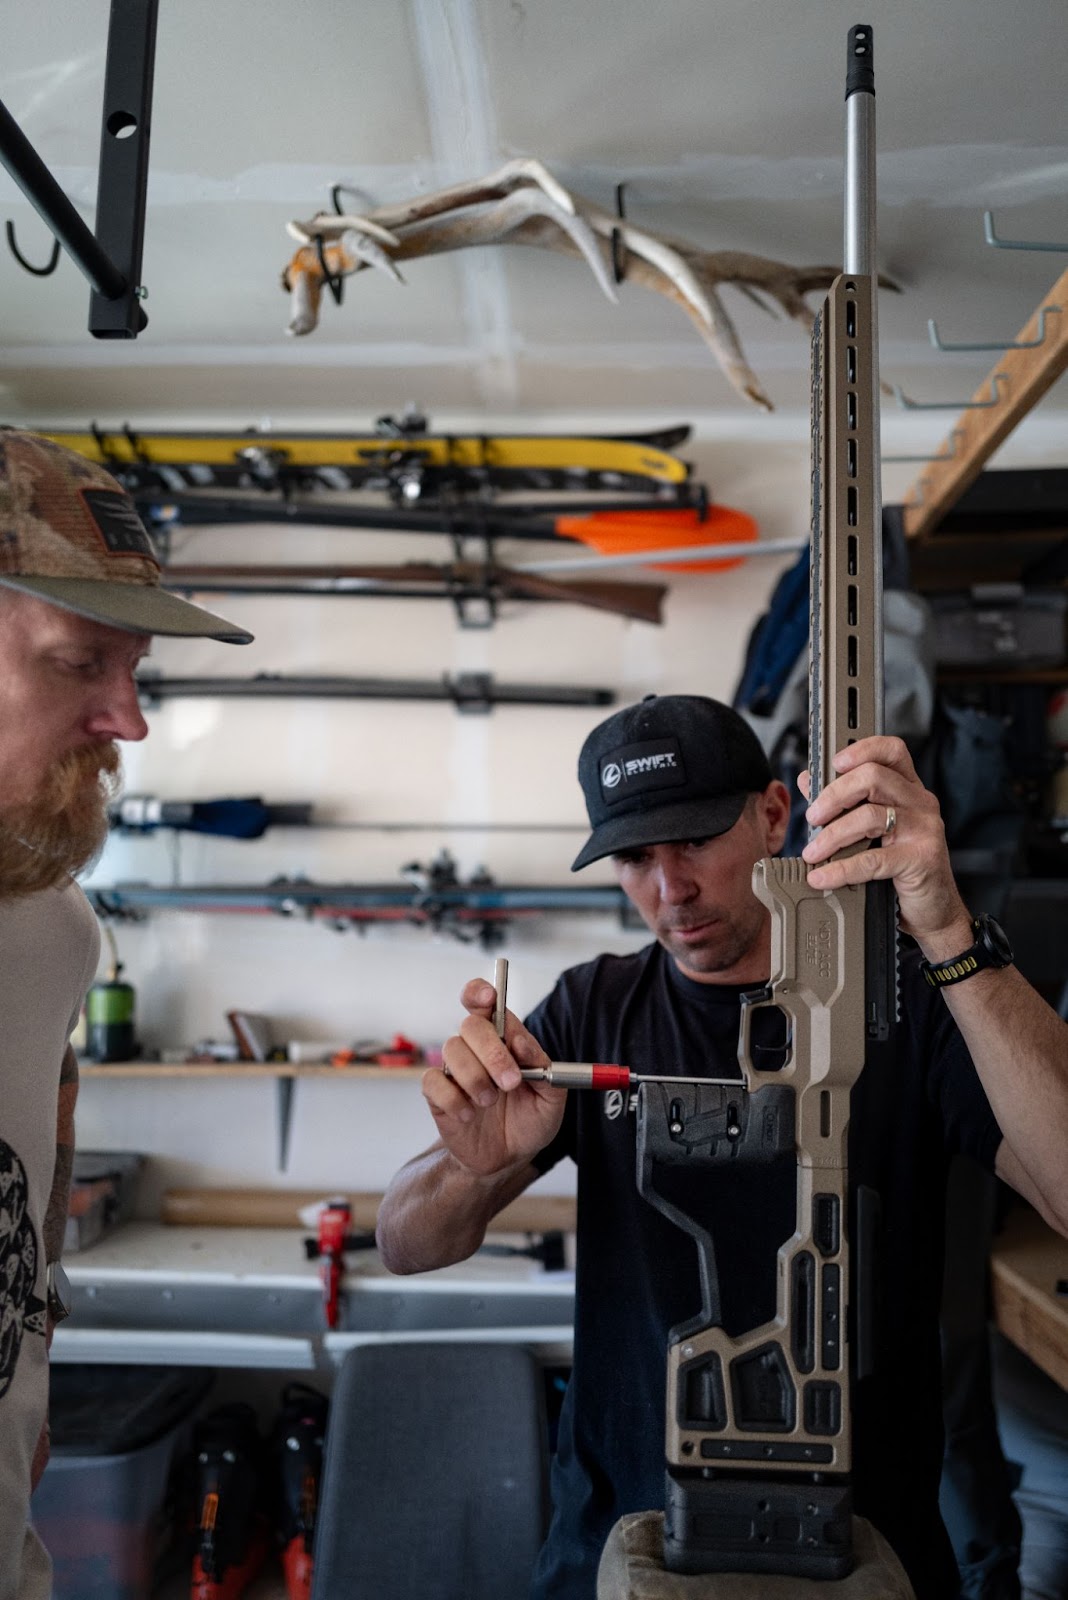
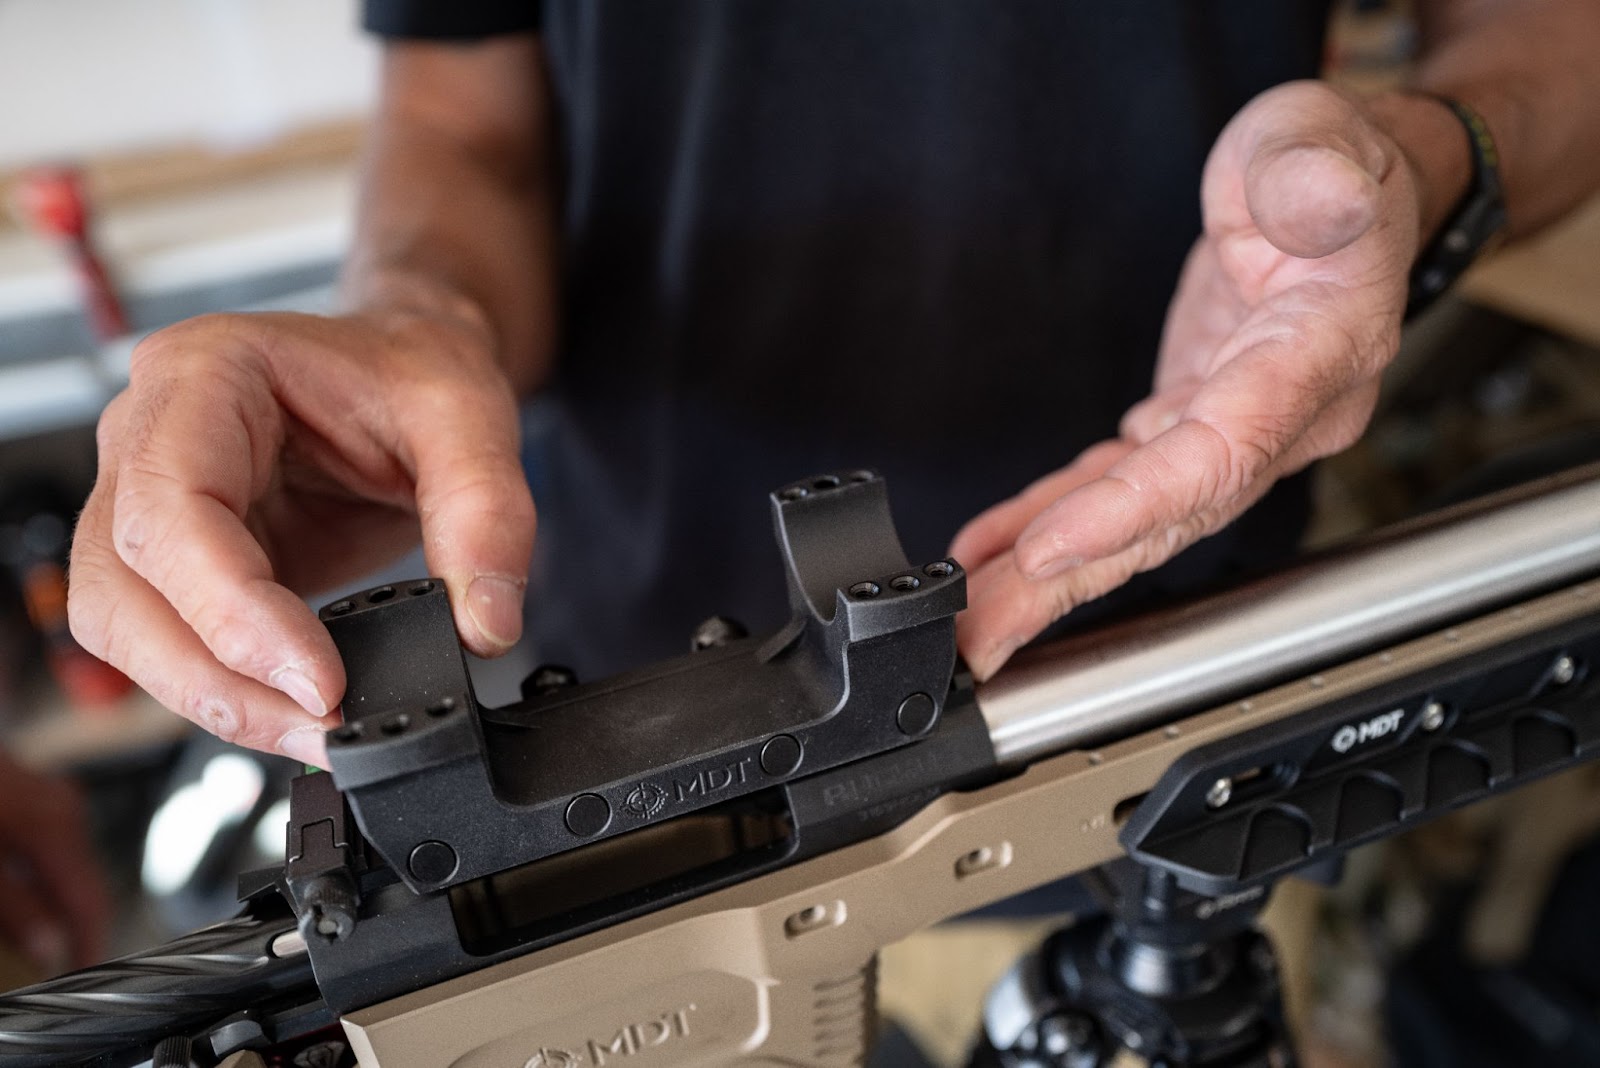
The action, barrel, and trigger were bedded into the chassis system, ensuring a secure fit. The scientific part during installation used gravity to secure everything together during this step, so everything tightened in the direction of the recoil—pro tip. The mounting of the Leica PRS scope was meticulous, ensuring it was perfectly level (checking bubble in multiple locations during tightening—tightened towards the recoil) and securely fastened to the action rail.
It's an ideal time to start adjusting the MDT ACC Elite buttstock components. The cheek riser is a simple tool less adjustment to align your sight picture relief and play with your length of pull for the buttstock pads. You'll make all the adjustments at the gun range, but it should get you down the right path. Bore sighting is a crucial first step in aligning your rifle's scope with the barrel before firing live rounds. It helps ensure that your shots land close to your target right from the start, reducing the number of rounds needed to zero the rifle. This saves time and ammunition, making the zeroing process quicker and more efficient. Finding an inanimate object at your zero will suffice. If the bore sight is off, adjust the rifle scope's windage (left or right) and elevation (up or down) turrets. Start by moving the scope's reticle in the direction opposite to where the bore sight indicates the point of impact is off. For example, if the bore sight shows that the impact is low and to the right, adjust the elevation turret upwards and the windage turret to the left. Make minor adjustments, then recheck the alignment to fine-tune the scope until the reticle aligns closely with the bore-sighted target.
ZEROING A RIFLESCOPE
With the rifle assembled (sweet process, right?!), the next step is to zero the scope. The beautiful thing about the Leica PRS scope is the toolless turret adjustment, which is simple and clean by removing the twist lock and the cap. The suggested range for PRS is 100 yards, but if the match designer is evil, you can be prepared for an offhand shot or a small diamond at 50 yards. You'll need a few targets; I prefer ones with a black background and orange highlight to show impacts—I'm not old, but I need a little help. It can be a walk-in process since you should be near the center at 100 yards—you'll adjust the elevation first and then the wind second. The rifle took me about eight shots to get the Bullseyes dead center, and I'm not an expert on sighting in a rifle.
To ensure the rifle was dialed in for longer distances, I repeated the process to 200 yards (then…300, 400, 500, 900). Each adjustment brought me closer to a perfect zero, and the rifle began to show its true potential. I also used a Garmin Xero chronography to measure average bullet velocity (at 100 yards) for Nosler factory ammo to start. I fed this data into a ballistic calculator to create a range card for various distances in my Kestrel and fine-tuned the muzzle data in my Leica Ballistics App.
Now that the rifle was assembled and zeroed, ongoing maintenance became crucial. Regular cleaning of the barrel, action, and optics ensures that the rifle continues to perform at its best. Periodic checks on the torque of action screws, scope mounts, and rings are also essential to maintain accuracy. Finally, re-zeroing the rifle periodically, especially after significant changes in temperature or altitude, ensures that it remains ready for the next adventure.
FINAL THOUGHTS
Building my first custom long-range rifle has been an enriching experience. From the initial consultation with a friend to the careful selection of components and the satisfaction of zeroing the precision rifle for the first time, every step has deepened my appreciation for the precision and craftsmanship of long-range shooting. Whether you're a seasoned shooter or someone just starting, the journey of building a custom rifle offers both challenge and fulfillment. By following these steps and maintaining your rifle properly, you can ensure that it remains accurate and reliable, ready for any challenge the field or range might present.
Learning to build a rifle is the first step for me, and the series will continue to cover the basics of long-range shooting, long-range positional training and movements, and hand-loading for long-range shooting. As the bow season approaches for Elk and Mule Deer, I'll chase them throughout the Fall. However, I'll also be back to sharing my knowledge on building my first HNT26 rifle for its first season in the backcountry of Montana.
Be good!
ABOUT THE AUTHOR
Ryan Holm is a dedicated marketing director with a solid 20-year career in media development within the hunting and outdoor markets. His journey is characterized by a strategic approach and a steadfast commitment to fostering brand growth and engagement, demonstrating his dedication and reliability. Known for his innovative thinking, Ryan has a talent for creating campaigns that genuinely connect with audiences. His profound understanding of consumer behavior is a key skill that he translates into effective marketing strategies that integrate both traditional and digital channels. His dedication to his interests is as strong as his commitment to his professional life. His passions for hunting, climbing, and photojournalism fuel his creativity and provide him with unique insights and experiences that enrich his professional work.
BUILD ARTICLES FROM MDT
- Custom Rifle Build - MDT Oryx | Zermatt Action | 6mm Arc
- Midwest Long Range Savage Mark II 22LR Budget Build
- $10,000 Rimfire Build
- The Ultimate 10/22 Build
- Premium Lightweight Hunting Build
- Backfire: 7MM PRC Build
- Desert Precision Gunworks Rimfire Build
- Impact Shooting 300 PRC HOWA Rifle Build
- Howa 1500 Carbon Creedmoor Build
- Ultimate Reloader - 7MM PRC Freedom Rifle Build
- Pushing the Limits of Economic 22 LR Builds
- The Rifle Keith Built
- Long Range With The Lillys - NRL Hunter Builds
- Building a General Purpose 300 Win Mag Rifle
- Building a 308 Tikka Rifle
- Building a 6mm GT for Competition
- Building a Lightweight Buffalo Rifle
- Building a Custom Bergara B14 for Competition